
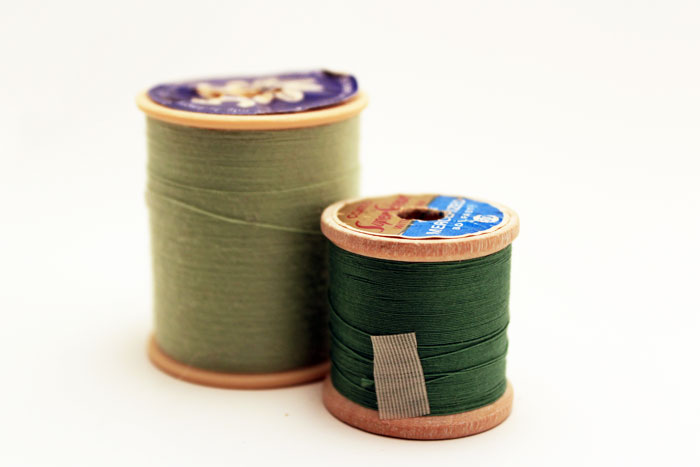
Follow this little tutorial to make your own Photo Light Box for the perfect lighting.
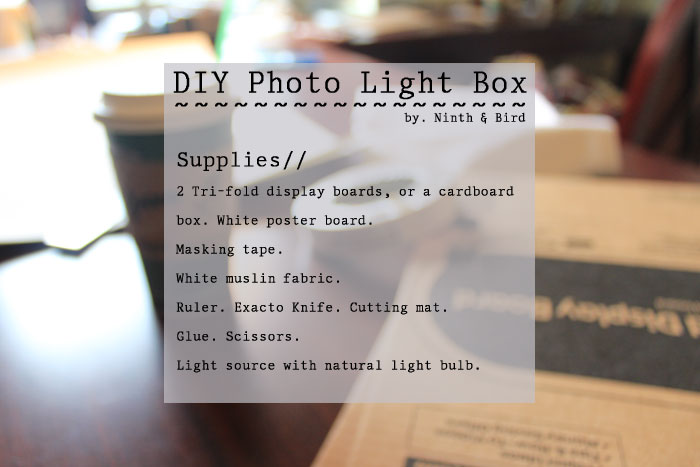
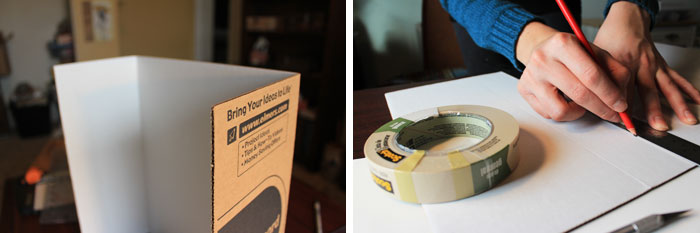
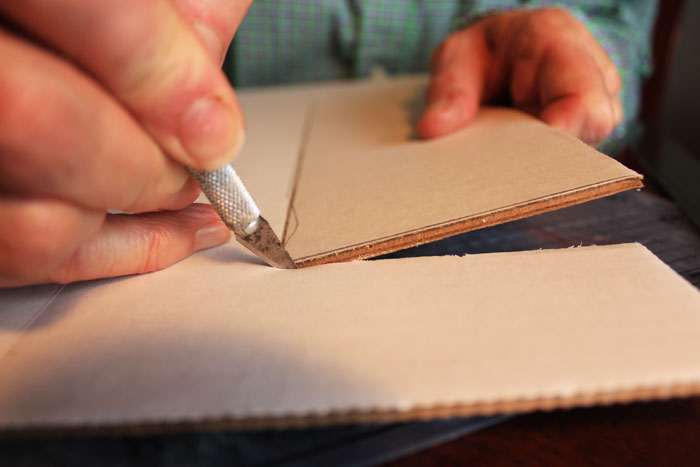
Cut a border of 2 inches on each side of the tri-fold display board (the two sides and the back). Make the front of the box (the part you'll take photos from) have a one inch border. Use the pieces you've cut out to add a bottom to the light box (or if you started with a cardboard box instead of a tri-fold display board, you won't need to do that).
Use a ruler and an exacto knife to make straight edges. You should have two pieces that look similar to the photo below:
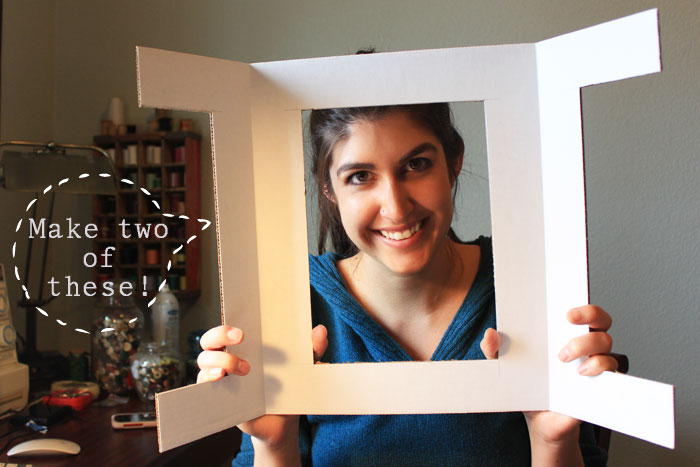
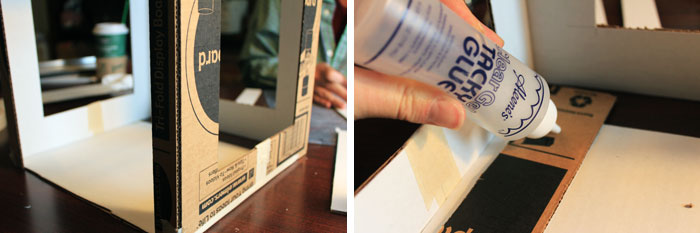
Use masking tape to attach the two pieces to form a box. Create more support by attached extra pieces of cardboard to the joints (it also covers up the tape with white cardboard). Cut white poster board to fit into the box, forming a curve at the back. You want the back of the box to appear seamless from the white poster board, like the image below:
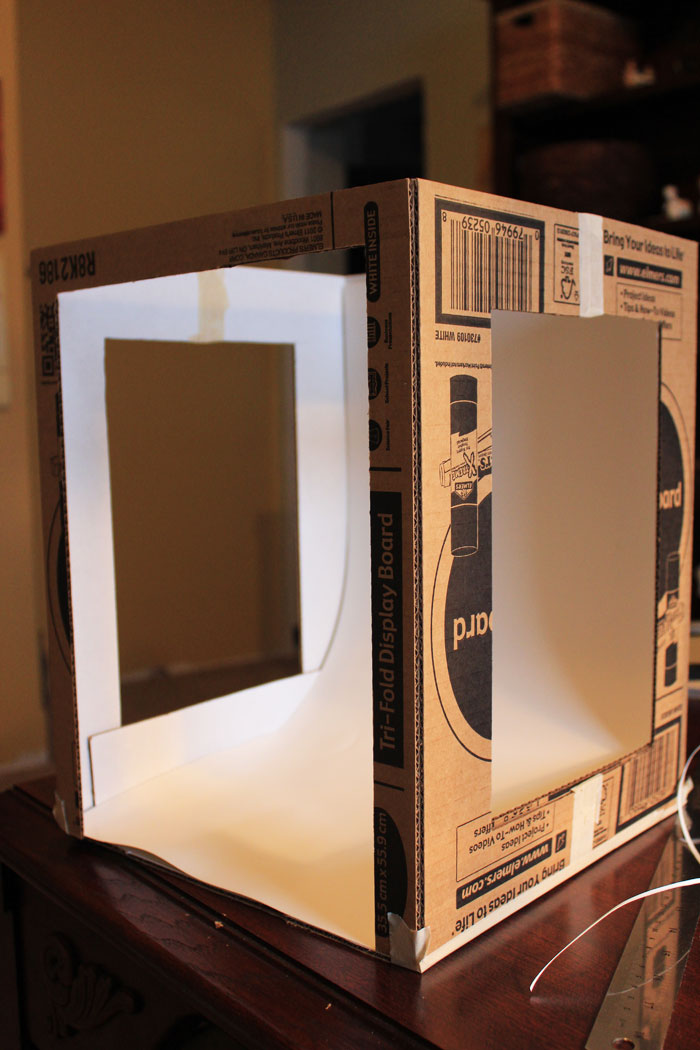
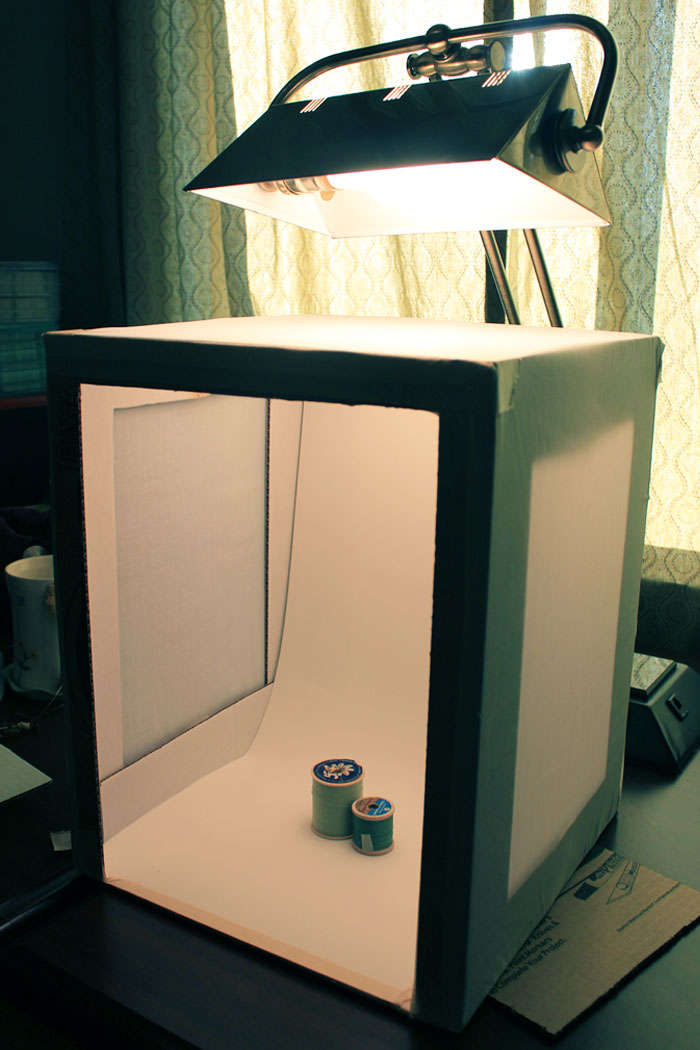
Finally, cover the two sides and the back with white muslin fabric, attaching it with masking tape. Use a lamp with a "natural light" light bulb to prevent a yellow glow on the items you are taking photos of. The final light box will look similar to the image below: Ta-Dah!
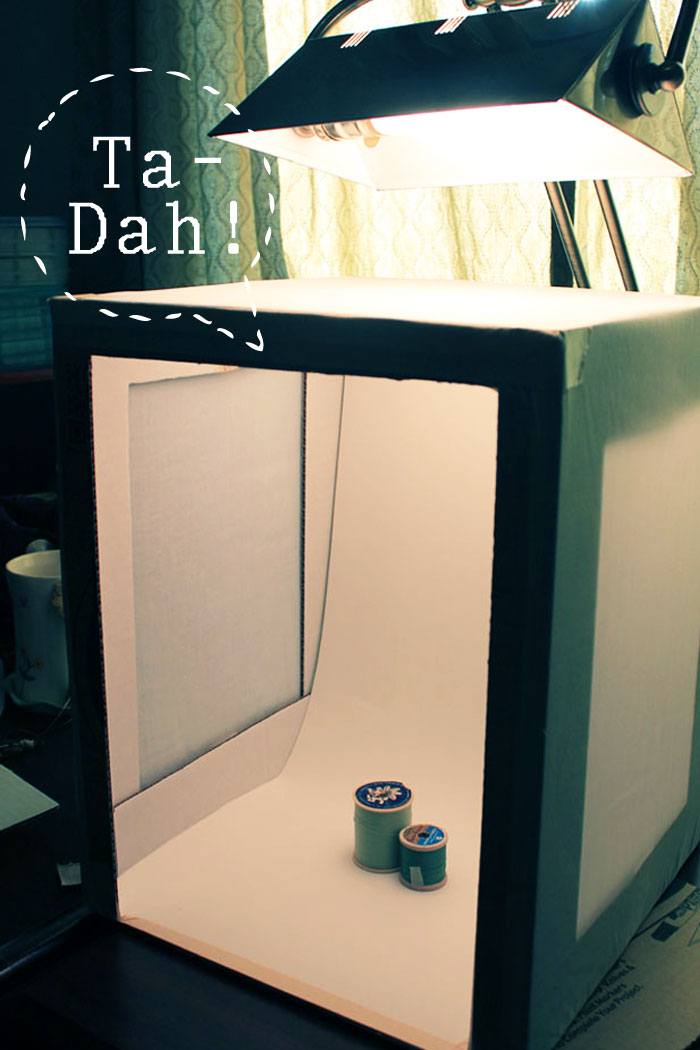
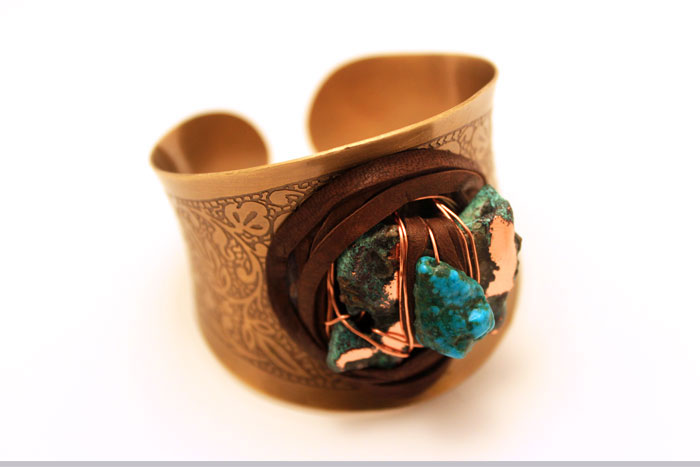
Ta-Dah! And that's all it takes to a great close up photo! The white background is a classic look and it really makes your item pop!


Wow, this is genius! I will definitely be making this soon, thanks!
ReplyDeleteGreat tute... have seen a similar concept before but not with the cutouts and muslin... I think this will make the difference - FABULOUS & Thanks! :)
ReplyDeleteI will definitely give this a try! Thanks so much for posting this! : )
ReplyDeleteGreat idea and it was so easy to make! Thanks!!
ReplyDeletewhere can the "white" lightbulb be found?
ReplyDeleteThanks for all your comments! You can get the light bulbs about anywhere. They are often referred to as "full spectrum" light bulbs. I found some at Wal-mart: http://tinyurl.com/7prf2ue
ReplyDelete-Katelyn, Ninth & Bird
I. Love. You!
ReplyDeleteAfter my MIL passed away I came to inherit quite a bit of jewelry and wanted to catalog it. Of course, that works best with good pictures. Now I know how to do this. Thanks so very much. A task I've been dreading (and therefore delaying) now seems so much more doable.
You are my hero.
ReplyDeleteWill be making one this weekend!!
Thanks!!!! MEGAN
I have been talking about trying this lately & buying vintage fabric for food backgrounds- same wavelength!! Thanks for posting the DIY :)
ReplyDeleteI wish I would've seen this post about 2 hours ago! I just ordered a pop up light box from eBay. Darn! This is a fantastic tutorial!! Thank you for sharing!
ReplyDeleteFabulous tutorial. I am going to give thus a try
ReplyDeleteThank you for the tutorial. Found you on pintrest!
I love this, I am going to give it a try also. Thanks
ReplyDeleteAnd same Found you on a re-pin on pintrest and I re-pinned it.
ReplyDeleteKatelyn- Hey! In made my light box. However, The desk lamps I found at Walmart recommend a 40w bulb. I went with the 60w ( bought 3 lamps) & the lighting is ok.My concern is that the 100w would just be too much for those little desk lamps. I know the brighter the better. Im still not convinced these are the lamps I need. I was having a difficult time finding a lamp TALL enough for my box.I was bound and determined I was going to get this project completed yesterday:)
ReplyDeleteIt appears your lamp is pretty substantial in height..do u think its still available? any suggestions?
thanks a bunch
jennifer
Hey Jennifer - yes finding the perfect lamp might be hard. I only use one, not 3, but I found my lamp at a hotel liquidation store. Basically its from a hotel desk - but you should be able to find one similar. You need one that adjusts similar to this design: http://image.lampsplus.com/is/image/N7169.fpx?qlt=75&wid=460&hei=460&fmt=jpeg
ReplyDeleteSorry you're having trouble. Perhaps I should have put better notes on the tutorial. Hope that helps!
-Katelyn, Ninth & Bird
Katelyn.hey. i'm just now reading your message.No,its not you.Promise. I think your blog is fantastic! I figured I needed a taller lamp but wanted to "complete" and "try it out" as soon as I could:):):) It was like getting a new toy.LOL! So, for the moment, I had to buy what was available.
ReplyDeleteIt worked with what i have, but its not 'easy'(as I have to prop the lamp up high to get it into the box) and I think it would be better to simplify my set with only 1 great lamp. I'll keep looking.This set up is definately better than what i have been creating.
Thank you for writing this tutorial, I greatly appreciated it!
jennifer
Amazing tutorial. I´m going to follow it :) Thank you!
ReplyDeleteI just love your box and I am a new follower. I hope you follow me too!
ReplyDeleteJust wondering where the best place to find the muslin fabric is? I'm located in Ontario Canada and was wondering if Walmart also carried this fabric like the light bulbs?
ReplyDeleteThanks and amazing tutorial!
Oh yes, WalMart will carry white muslin fabric - at least I've never seen them not carry it. I'd say most all fabric stores carry that! :D
ReplyDeleteGlad you liked the project!
-Katelyn, Ninth & Bird
Thank you! I'll make one during craft support group and show you the results !!
ReplyDeletebrilliant tutorial, am in the process of making one right now, just need to cover it with the muslin. Going to use it to photograph my sculptures. Thank you
ReplyDeleteThis comment has been removed by the author.
ReplyDeleteThanks for sharing the tutorial! I'll have to make one of these for myself. I found you via Pinterest.
ReplyDeleteThank you so much for sharing, I'm making one this weekend.
ReplyDeleteThe inside of the box is white, my cardboard isn't, could I paint it white?
Could I use something other than muslim, maybe white cotton shirt? I hope these questions are not silly, I don't know anything about photography, I do want to take better photos for my blog. Thank you.
Yeah, I would paint it or just glue white printer paper on the inside. A white cotton shirt might work! I think as long as it's thin enough to let the light through. Have fun! Let me know how it works out!
ReplyDelete-Katelyn, Ninth & Bird
Thank you for posting this tutorial, taking that "perfect" picture can be sooo difficult. I am definitely going to have a go at this! :)
ReplyDeleteBrilliant! Thanks for the great tutorial- and great photos!!
ReplyDeleteThis is just what I need! Thank you for the tutorial. Getting the boards and making it tomorrow!
ReplyDeleteThis is great! Thanks for sharing!
ReplyDeleteIs there a time of day that is best to take advantage of true "Natural" light along with the natural light bulb? I am photographing supplements for our company and the front of the bottle(colors and lettering) are coming out a bit dark? Besides that, I can't believe how great they look! Thank you:-)
ReplyDeleteI wish I had one of these right now! I can't wait to make this. Thanks so much. I hope it will help me improve the photos on my site OneCreativeMommy.com. Great tutorial!
ReplyDeleteI made this and I love how my pictures look in it. I didn't want to spend tons of money buying a lightbox and this fit the bill! Thanks so much for taking the time to put up this tutorial! :-D http://rachelknowsstuff.blogspot.com All of the pictures on there, except if they don't have a white background, were taken in the box I made with your instructions!
ReplyDeleteDoes the fabric go ontop of the box?
ReplyDeleteYeah, Tape it to the outside of the box! :)
ReplyDeleteWow! That's a very good idea! Will definitely try for my crafts! Thanks for sharing this!
ReplyDeleteThanks so much for sharing- I am definitely trying this!
ReplyDeleteThis is a fabulous idea! I just added it to my list for Cardboard Boxes Up-cycled! I also can't wait to make one to take better photos of my jewelry for my etsy shop.
ReplyDeletehttp://www.brainstorminbloom.blogspot.com/2012/12/cardboard-box-up-cycled-csa.html
Thanks,
Sara
You can obtain floor stand or desk lamps at most craft stores in the needle work supply areas or mail order them for needle work supply websites. They come with a natural light bulb.
ReplyDeleteIf you can't find a 'natural' or 'full spectrum' lightbulb for whatever reason, you can change the 'white balance' setting on your camera from 'auto' to 'tungsten'. When you use an old-fashioned incandescent bulb, it puts out yellow light. The tungsten setting on your camera neutralizes the yellow and makes it white light.
ReplyDeleteThanks for sharing the tutorial!
ReplyDeleteI'm gonna give this a whirl, the lighting in my home is terrible my photos seam blahish! thanks for the info.
ReplyDeleteThank you so much for this tip! I have just started writing my own food blog and need more inspiration for the perfect photos. Can't wait to give it a try! And that light is amazing, where could I get one?
ReplyDeleteThanks! I got the lamp at a used hotel furniture place. =)
ReplyDeleteI use an old chick warmer lamp. It's too wobbly for chicks, but for pictures when it's on for short times AND supervised, it's perfect. Plus, unplugged and cooled down (doesn't take but a few minutes), it fits perfectly in my box, which is then stored safe from toddler hands and dog toys. So everything other than the camera is just always gathered together. I've also got a few fabrics I store in a tote under the box, if I want a different background than white. Nothing is lost or damaged.
ReplyDeleteI also use a "natural light" LED bulb. Super low wattage, reads to be low lumens (which is actually what you want to look at vs wattage, I can explain if needed), but holy Batman's cape, that sucker is BRIGHT. DH didn't believe me that it was bright, and looked directly into the bulb as he turned it on. He believes me now.
I'm so falling in love with your blog. I'll be making one asap. Thanks for sharing this.
ReplyDeletexoxo
xtian
Great idea but I found using one of those large, opaque, plastic storage boxes, which usually come with a lid, are very good and rigid for capturing objects and you get an all round light according to where you place the lights. Colour correction is also easy to correct.
ReplyDeleteregards JohnL
Wonderful tutorial!
ReplyDeleteI was curious to know how this works with a plain old point and shoot camera? Usually to get the best effects from light boxes... a more professional camera is better/required.
Thank you!!!
Thanks! Well, I haven't tried it with a point and shoot - I only have my Cannon, but I suppose it would still look good with a less sophisticated camera. Also, if you had photo editing software you might be able to just tweak the photo a little and make it look better. =)
ReplyDeleteI was kinda thinking the same thing, but secretly hoping I was wrong. Hahaha Thank you so much for the help!
ReplyDeleteThis comment has been removed by the author.
ReplyDeleteThank you for easy tutorial, this is just what I was looking for so that the photos of my greeting cards turn out better. Can't wait to try this.
ReplyDeleteI just now found you and this project on Pinterest. Such a coincident! Last Saturday I gathered up materials to make a box similar to this. I stalled because I wasn't sure of if it would work. Now I know it will! Thank you very much!
ReplyDeleteOh I am soooo gonna make me one of these! I've been using just a sheet of white paper near the window and the other day I'd got a paper cut without realising and bled all over it. I love the idea of a bit more control of shadows etc. Thanks
ReplyDeleteDid you put the muslin over the top of the box also?
ReplyDelete